Rosewold Mini Greenhouse Project
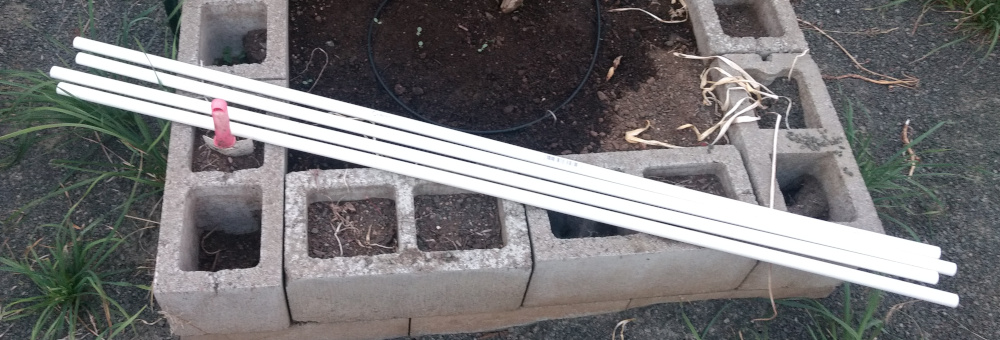
Greenhouses, aka Spiders: Lois and I were worried about early
and late frosts where we live (in Eugene, Oregon), so we cooked up a
scheme to put clear trash bags, the 61 inch by 68 inch kind that will
fit in a whole rolling dumpster, on frameworks of 1/2 inch PVC pipe,
thus creating a mini-greenhouse with a 30x30 inch footprint. We are
very pleased with the results.
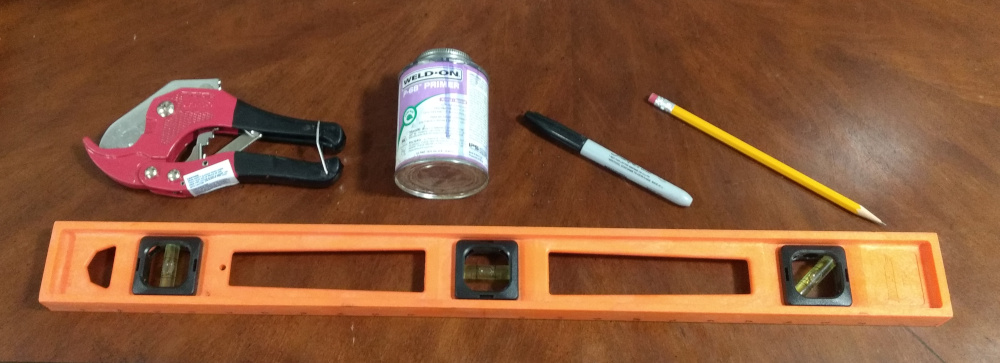
- Tools:
- PVC cutter (you can use a saw but a cutter is cleaner)
- PVC cement (a small can will do)
- Sharpie and Pencil (for alignment markings)
- Bubble level (so leg tops are about even)
- Ingredients: for six mini-greenhouses.
- 1/2 inch PVC pipe, 10-foot length, qty 16, cost us 1.76 each.
- 1/2 inch PVC elbow, qty 24, cost us 2.97 per bag of 10.
- 1/2 inch PVC cross, qty 6, cost us 1.44 each.
- ToughBag 95 Gallon Trash Bags, 61" W x 68" H, 1.5 mil, clear.
cost us $23.98 for 25 on Amazon. Other brands are available.
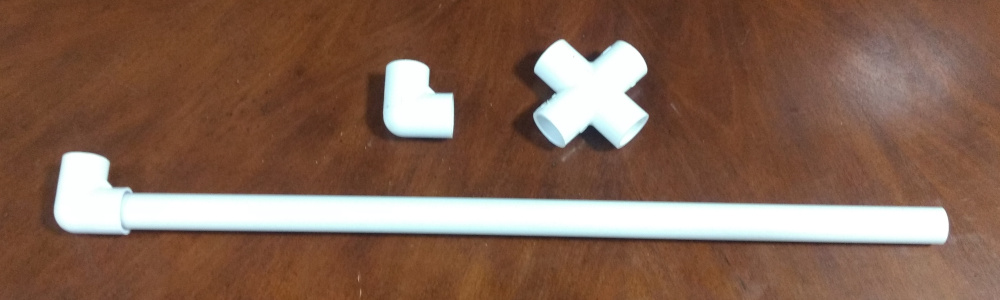
- Legs: make four legs per mini-greenhouse.
- Cut each 10-foot length in half, yielding 32 5-foot lengths.
- Set aside 6 x 4 = 24 of the 5-foot lengths for legs, four per greenhouse.
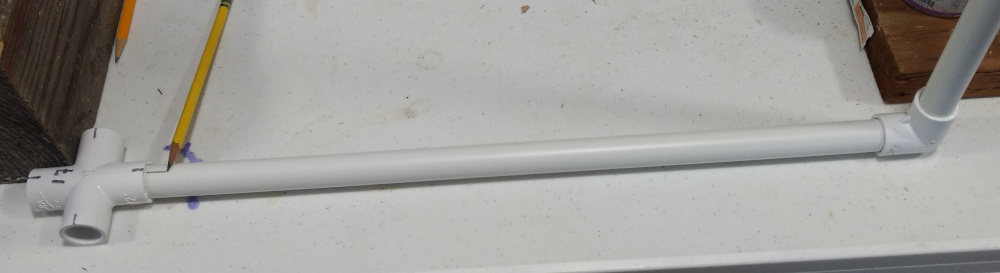
- Shoulders: make four shoulders per mini-greenhouse.
- Cut the remaining eight 5-foot pieces into 19.5 inch pieces.
If you decide to use 3/4 inch PVC you may need to shorten the length. - Yield: 24 SHOULDERS plus a small extra chunk you throw away.
- Use PVC cement to glue an elbow on one end of each shoulder.
- Let the PVC cement cure for at least two hours to bond well.
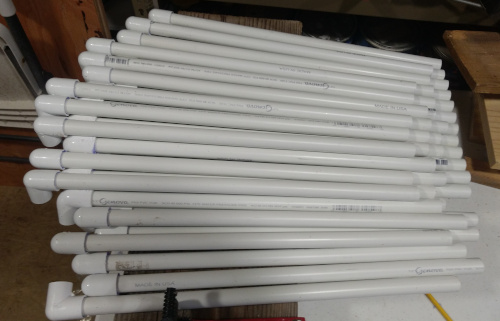
- Cut the remaining eight 5-foot pieces into 19.5 inch pieces.
- Tops: this is the hardest part; work carefully.
- Set out a cross, flattest side down.
- Mark (with sharpie) each end with a dot for alignment later.
- Do a dry insertion of a shoulder into any side of the cross.
- Use another piece of 1/2 inch PVC to get a good angle. Try to point the elbow straight up (close is good enough).
- Mark the shoulder with a pencil line (3/4 inch or so) matching your dot. Remove shoulder and set aside.
- Dope one side of the cross with PVC cement.
- Insert shoulder as far as it will go (about 1/2 inch).
- Twist shoulder until the pencil mark lines up with the dot.
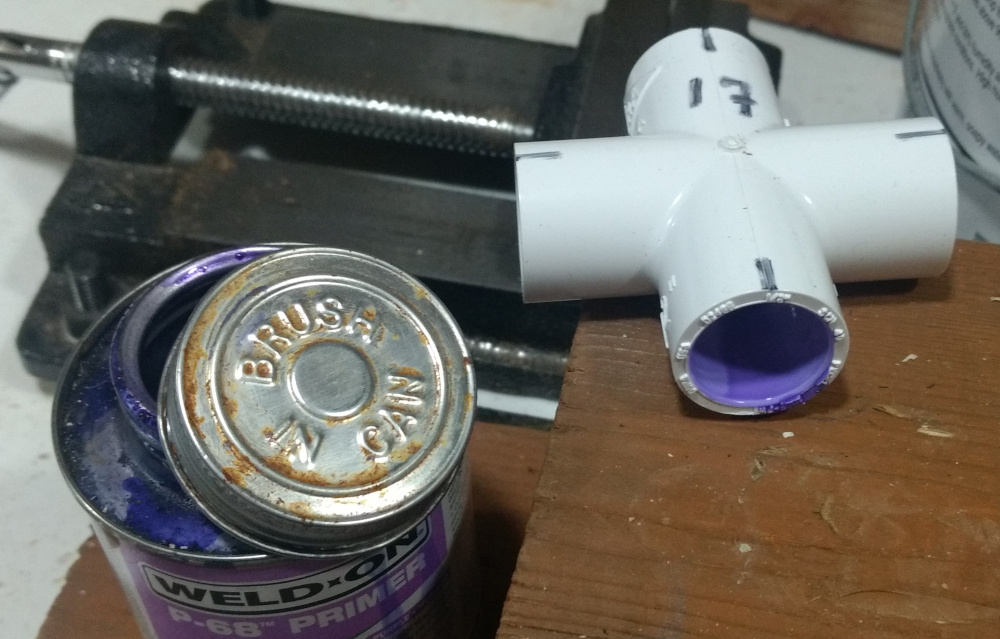
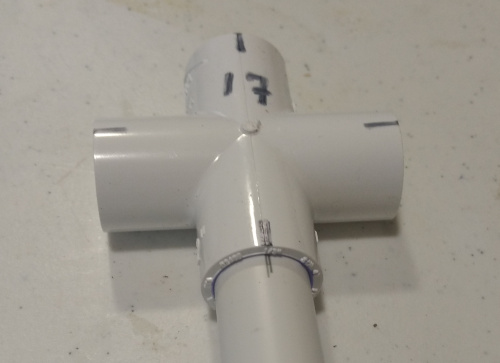
- Repeat for the other three shoulders.
- Yield: one TOP.
- Repeat for each of the other crosses.
- Let the PVC cement cure for at least two hours to bond well.
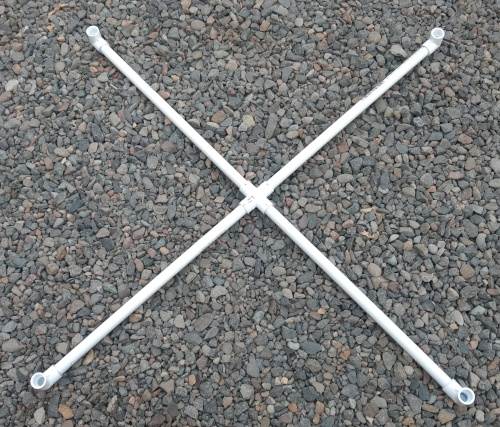
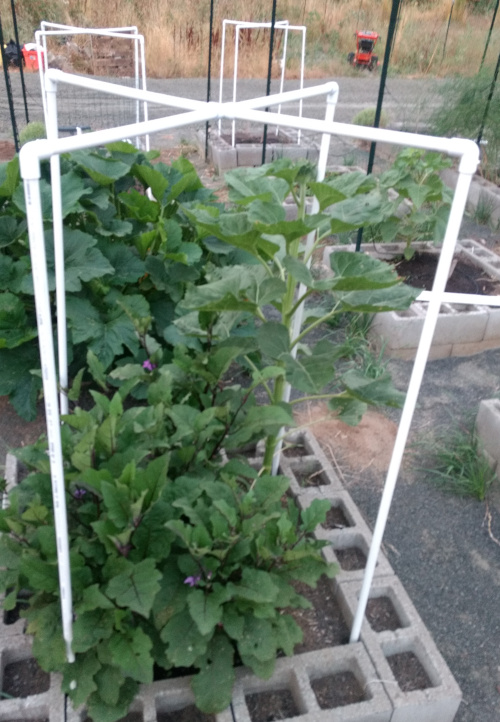
- Spiders:
- Insert four legs into your garden soil in a 30x30 footprint.
- Make it so the tops of the legs are level with each other.
Hint: use a 4-foot level, or a shorter level on a board. - Place a top on the four legs previously placed in your garden.
- Push down gently. Someday you may want to remove the top and store the top and legs separately.
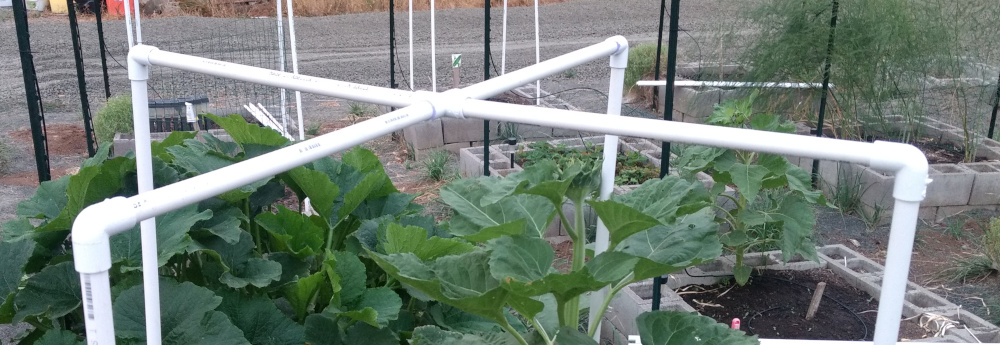
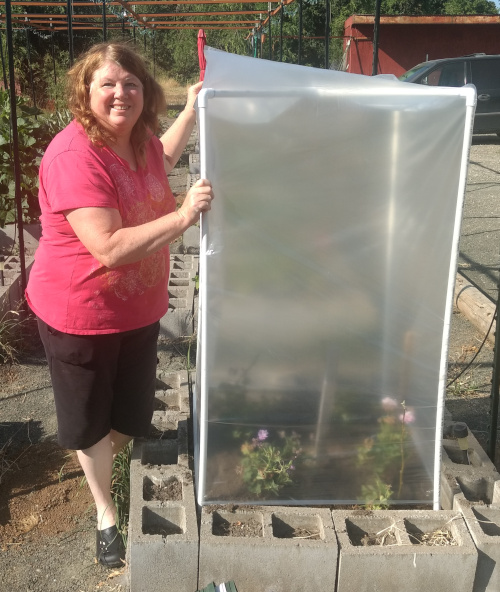
- Greenhouses:
- In case of cold weather, slide a sleeve (clear plastic bag) down over the spider.
- Warning: it can get pretty hot inside if you do this in warm weather.